
Please visit ArcadeMade.com for unique arcade and pinball themed T-Shirts, posters and mugs.
Portions covered in this journalistic arcade restoration include:
- Intro Story
- Arcade Monitor Repair
- Arcade Cabinet Repair (wood working, bondo, sanding, painting, wet sanding, wax finishing)
- Metal Working (restoring and repurposing an already converted control panel)
- Control Panel Designing/Planning/Assembly
- Electronic Cabinet Wiring & Setup
- Artwork Installation (NOS Final Fight Arcade Kit)
My Final Fight journey originated in 1989, but was recently rekindled after visiting a thrift store. There, in the back room, was a PVC pipe that was virtually identical in shape to Haggar's Final Fight weapon of choice!
As a Capcom and Street Fighter fan, I had to pick it up.

Soon, I decided to paint and clear coat the pipe to look just like the game's original noggin knocker. From that day forward, I took to the streets and began restoring all that once was in Metro City...

But would I be able to locate a cabinet and complete each restoration level? Could I obtain the end credits and arcade glory?
Might there possibly be a happy ending?

Chances seemed slim... but then...
The plot advances after a breakthrough...

While out of town, I randomly was looking at Craigslist and I came across a garage sale ad that included a Final Fight themed arcade cab that had been converted to a MAME machine. A giant X-Arcade joystick had been bolted on the front (the original was missing) and an LCD was installed where the glorious RGB monitor once lived. We won't burden you with the imagery.
As the cabinet looked decent, I made plans to stop by and check it out. It quickly occurred to me that this was the Final Fight cabinet I was seeking to restore due to the specific shape and design of the cabinet.
From all research, Final Fight was never given a "dedicated cabinet" from the factory. That is, you couldn't order a complete Final Fight cabinet from the factory delivered to you. What Capcom did instead was design an arcade cabinet conversion kit that could be used to convert an existing game (Joust/Robotron/Pacman/Donkey Kong etc) into a Final Fight arcade game. This was a very popular concept at the time and it saved arcade operators money by reusing old games.
While the art included in the Final Fight conversion kit could be cut and trimmed to fit other cabinets, it specifically seemed to be designed to fit the Data East cabinet shape that Kung Fu Master and Karate Champ came in as the bezel is a drop in fit. This design also shares many dimensions with the Dynamo HS-1 cabinet. Many arcade enthusiasts might also consider the HS-1 to be a fitting for Final Fight (which it is in its own right and a suitable choice). HOWEVER, the control panel shape on this cabinet is specifically different and which is the key and enables the "Final Fight" logo to display exceptionally well. It is also not "corner-cut" which can crop and reduce the artwork.
When Capcom later released a Final Fight Double Impact compilation on the XBOX 360, they even featured this specific cab in advertisements:

Knowing that this was the cabinet to get, I picked it up, and removed and resold the extra MAME parts to recover my cost.
Here's what I was then left with, the side art was tattered and faded, it had chips and some issues, but an overall solid and legit cabinet from back in the day:

The cabinet came gutted. No wiring, power supply or marquee light. The coin door also was empty, just the front shell with no back.
Caught between a rock and a hard place, it looked like I'd be starting this fight from scratch...

First off, I needed a control panel.
This is the most difficult, time consuming and most challenging level in arcade restoration (unless you may have a faulty arcade PCB game board or troublesome monitor).
Fortunately a few years earlier I had picked up a converted Karate Champ control panel that had been turned into a Sky Shark and it essentially fit the cabinet, yet the mounting was all different, so I needed to cut and install a brace (much like an HS-1 cabinet) to secure the control panel and adjust the latch/strikes to match up.


Then I cleaned off the old control panel overlay using paint remover and a lot of elbow grease.

Finally, a wheel attachment was used on a power drill to really grind it down and shine it up.


Once that was done, I needed to make the panel usable for a Final Fight two-player, two-button layout. This control panel was originally Karate Champ with four joysticks which I used to my advantage. The left sticks would become the main joystick holes and the right joystick holes would be for the jump button. I'd just need to repair and drill appropriate holes for the attack buttons.
I measured and sketched the layout.

And test fitted:

Next, I needed to repair the extra holes and make a clean top.

I cut a new piece of galvanized stainless steel to go over the top. I used a 26 gauge galvanized steel sheet. The thickness provides sufficient strength while still being easy enough to cut with a tin snips. Lowe's has 24x36" sheets of this for about $12.

First I drilled out the player 1 and player 2 start buttons (and a couple other holes) as they would be harder to drill once assembled on my drill press).
Using a bit of Elmer's School Glue works really well as a type of lubricant when drilling. I caked it on in a ring quite thick around the drill area.

A 1 1/8" carbide tipped hole cutter with a 1" cutting depth and auto ejecting slug was used to cut the holes. It's available at Home Depot.
I then clamped down and used epoxy to secure the metal plate onto the control panel itself.


I used Gorilla two part epoxy that sets in five minutes. Using the kind that sets in five minutes rather than an "instant" setting kind will provide much better strength based on videos I had watched.
This was left to sit over night and it worked quite well. I just needed to add a bit of extra super glue on some edges for a final touch.
Next, I placed all the button and joystick measurements on the control panel and started drilling holes with the drill press.

Painting and priming the control panel was next.

Because Final Fight uses control panel decals for the attack, jump and start buttons, I wanted to protect them and so I cut a lexan cover that will give the control panel durability and a polished look. In fact, the original Final Fight conversion kit even came with a piece of plexiglass just for this purpose.


Last summer, I had picked up a converted Stargate control panel that had been turned into Final Fight. This was a gold mine as it had the original attack and jump button labels still on it AND had original Capcom issued Final Fight joysticks and buttons.

Removal of the decals with razor blade:

I didn't have the start button graphics, so I recreated them from photos online.

The joystick handles were also soaked in rust remover, drill polished and chrome painted and given clear coating for protection.

An NOS, new old stock, control panel overlay was then carefully put on. This is an original piece of art from 1989 that had never been used.

Lining up the control panel overlay position was crucial, and in the end I found I had only about 1/8" of leeway to get it in the exact correct spot so that the large "F" on "Fight" would fully be seen, and the "Final" wording would be fully displayed just at the curve and not be overlapped by the lexan top.
The holes were then cut out.

Everything was then assembled on the Final Fight control panel.
After all this effort (and other steps not shown), the results spoke for themselves... stage completed!

--------------------
Final Fight History Factoid:
When Final Fight was first advertised it was given the name "Street Fighter '89." Later it would be changed to "Final Fight." Over the years the Final Fight characters would eventually join forces with the Street Fighter cast in many games, including the Alpha series, Street Fighter III, IV and V series.
I made some great toppers for the cabinet using flyer art along the way.

--------------------
Moving along, the wooden arcade cabinet needed a good bit of work.
The old art needed to be removed using a combination of paint remover, goo gone and elbow grease.

All of the cabinet imperfections were filled with filler and sanded in multiple rounds (not shown).
The cabinet was then painted. First I used a rattle can paint/primer, which to be honest looked pretty terrible. I then used a foam roller brush which was better but left a lot of paint lines and some orange peel.

Then, I read about wet sanding and this REALLY brought up the level of quality on the end product. Basically, you wet down the cabinet with a spray bottle (I mixed a bit of Windex in as well) and then I sanded it down with 220 grit slowly and repeated and repeated. Arms were very tired.


Afterward the cabinet was a bit grayed with micro scratches, yet it was smooth.

So, like any good martial arts adventure quest, it was time to wax-on, wax-off.

And look at that buttery smooth, glass-like finish!
The cabinet ended up with a great original look with some legit yet highly polished patina. Because all Final Fight cabinets (that I knew of or ever saw on location) were converted cabinets, this is about as nice looking as it would realistically ever have been on the streets at an arcade location.
Casualties of War
In most epic quests not all players make it to the finish, yet what they contribute along the journey is never forgotten in the story arch...
When I received this Final Fight cabinet it was empty and completely gutted. I also had a Double Dragon 2 HS-1 cabinet that was highly water damaged and was too far gone.

Fortunately, though, the Double Dragon 2 cabinet did have all the internal wiring! And it fits well and light fixture etc is the correct size.

So I took all the wiring and coin door parts from the Double Dragon 2 cabinet and placed them in the Final Fight cabinet, along with a monitor I repaired with 30 some new capacitors. I put a burn free tube from a 19" TV set on the monitor for a nice image. A new power cord was installed, and the marquee light was fixed.

And finally, the last stage was reached...
The final boss was essentially installing the remaining cabinet artwork.
Initially, I had created a new bezel graphic and spent much time getting it printed to the correct size.

But then, luck struck! I'd found a shiny emerald on the street.
Just a few days before I was to complete the Final Fight journey, I was tipped off on an original Capcom Final Fight Arcade Kit!
As shown in the photo below, this legit kit included an original control panel overlay, marquee, side art, and the most cherished piece: an unfolded never used bezel graphic (which would essentially be near unobtainable). Very cool!

Artwork was then measured and applied to the cabinet.


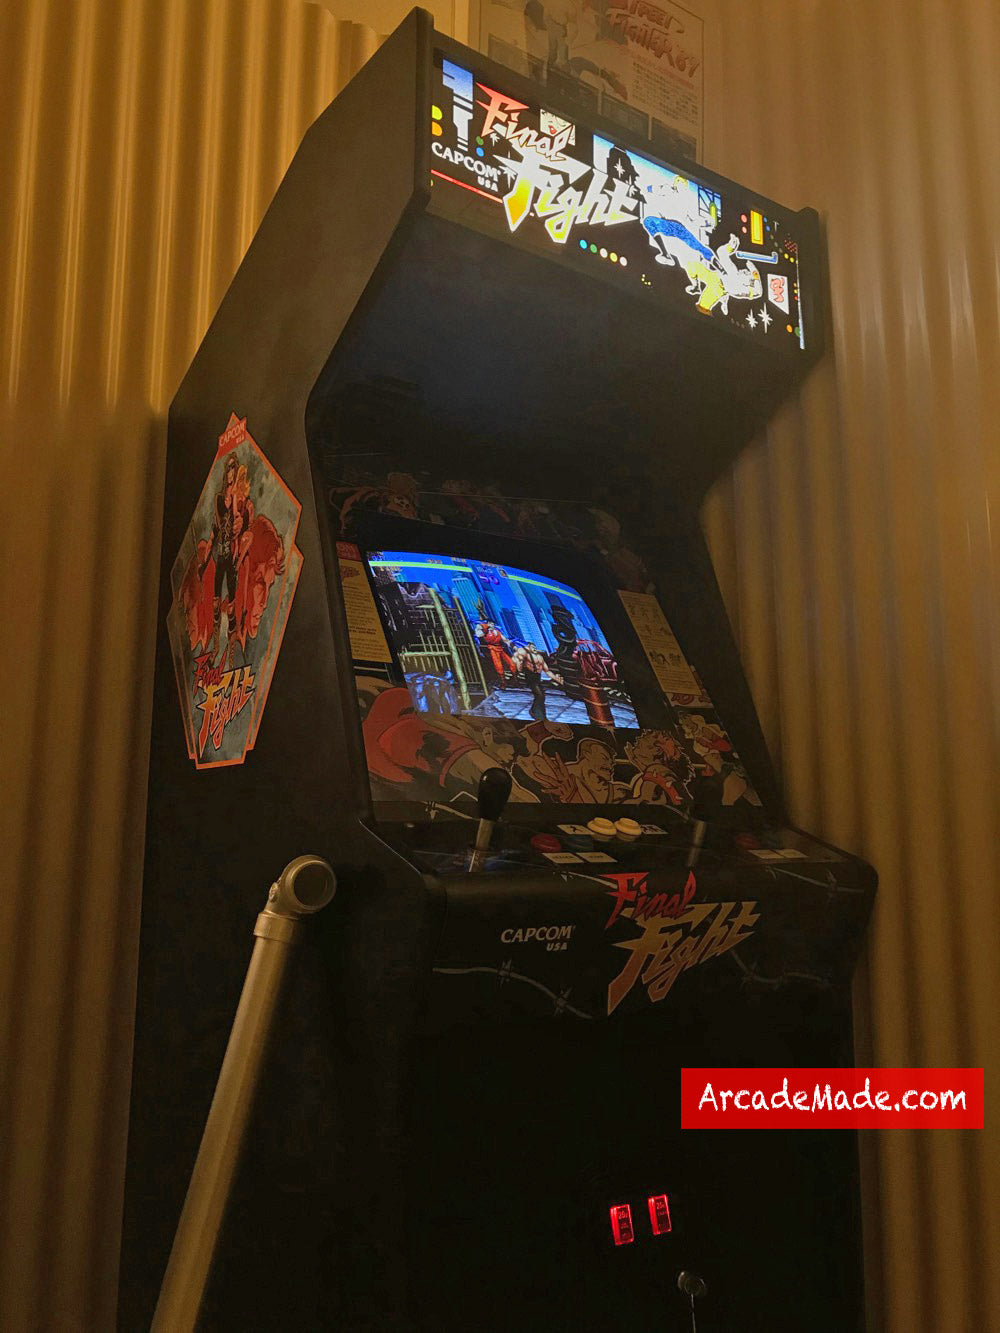
Mission Accomplished!

It's a happy ending!

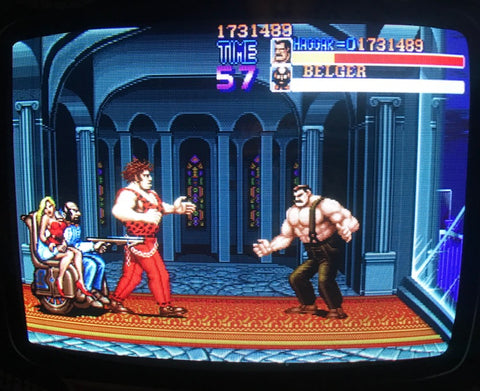
And what does Haggar have to say?

I'll take his word for it.
But for the rest, pictures can speak for themselves.
Back on the street in Metro City, it's Final Fight!


Please visit ArcadeMade.com for unique arcade and pinball themed T-Shirts, posters and mugs.